Why Is My Hummingbird Feeder Leaking? Causes & Fast Fixes
Hummingbird feeders leak primarily due to lost internal vacuum pressure or thermal expansion. When direct sunlight heats trapped air inside an inverted bottle, the expanding gas forces nectar out through the feeding ports. To stop leaks immediately, cool your nectar before filling, invert the vessel swiftly to lock the seal, align the rubber gasket, and hang in complete shade.
Visualizing Feeder Physics: Vacuum Pressure & Thermal Expansion
- Is nectar dripping continuously right after filling? → Yes: Check internal vacuum seal & rubber gasket alignment immediately.. No: Proceed to thermal and environment checks..
- Does dripping occur only during hot afternoon hours? → Yes: Thermal expansion of trapped air is pushing liquid out. Move to full shade and fill reservoir to 95% capacity.. No: Check wind sway or bird perch tipping dynamics..
- Is fluid leaking from the base threads rather than ports? → Yes: Inspect rubber O-ring for cracks, food debris, or cross-threading.. No: Re-evaluate reservoir liquid volume and ambient shade level..
Hummingbird Feeder Leak Symptom & Diagnostic Matrix
| Symptom Scenario | Root Physical Cause | Immediate Garden Fix | Long-Term Prevention |
| --- | --- | --- | --- |
| Continuous steady dripping from port flowers immediately after hanging | Failed vacuum establishment or damaged air seal | Invert vessel rapidly over sink to form immediate vacuum lock | Ensure reservoir is filled to 90-95% capacity to minimize air pocket volume |
| Dripping begins between 1:00 PM and 4:00 PM on sunny days | Solar heating expands top air pocket, forcing nectar downward | Relocate feeder to dense tree shade or under a protective porch overhang | Switch to a slender glass reservoir design with reduced top air surface area |
| Nectar trickling down the outside of metal/plastic base threads | Misaligned, dirty, or cracked rubber O-ring gasket | Unscrew base, clean nectar crust from grooves, and re-seat gasket flush | Replace worn rubber gaskets annually; avoid over-torquing metal threads |
| Drips occur during breezy or windy afternoon gusts | Kinetic sway pushes nectar above internal port thresholds | Shorten hanging shepherd hook wire or add a stabilization tether | Use heavy hand-blown glass feeders with anti-sway solid metal mountings |
| Dripping accelerates when the reservoir drops below half full | Expanded air volume expands dramatically under mild temperature shifts | Refill reservoir back to top level with fresh cold syrup | Maintain a strict 2 to 3 day refill schedule regardless of nectar level |
Match your exact dripping scenario below to find the root mechanical cause and implement a fast, two-minute garden fix.
The 5-Minute Leak Prevention Pre-Fill Checklist
- [ ] Cool homemade sugar water to room temperature or lower before pouring into the bottle.
- [ ] Inspect rubber O-ring gasket for cracks, sticky sugar buildup, or misaligned seating in the base.
- [ ] Fill the reservoir 90% to 95% full to leave only a tiny air pocket at the top.
- [ ] Thread the base on firmly until snug—avoid over-tightening which warps the seal.
- [ ] Invert the feeder swiftly in one smooth motion over a sink to establish instant vacuum lock.
- [ ] Hang in full canopy shade, protected from midday sun exposure and violent wind gusts.
Pro Tip: The Thermal Equilibrium Trick for Hot Summer Days
When ambient temperatures climb above 85°F, air inside standard inverted glass bottles acts like a heat engine. As solar radiation warms the air pocket trapped at the top of your reservoir, that air expands rapidly according to ideal gas laws, building internal atmospheric pressure that forces nectar down and out through the port flowers.
To beat the heat, use the Thermal Equilibrium Trick: Refrigerate your prepared 4:1 sugar syrup before filling. Fill the vessel nearly to the neck, screw the base tight, and invert quickly. The cold liquid chills the internal air pocket, keeping initial pressure low. When hung in full shade, the cold nectar resists solar warming for hours, preventing afternoon drips and keeping syrup fresh for tiny visitors.
5-Minute Feeder Leak Decision Tree
- Is syrup leaking from the feeder right now? → Yes: Where is the fluid escaping from? Check feeding ports vs threaded metal junction.. No: Your seal is intact. Maintain full shade placement and regular cold fills.
- Is the fluid coming out of the feeding port flowers? → Yes: Did you fill the vessel with warm liquid or leave a large top air space?. No: The leak is at the threaded base. Clean sugar crust from the rubber gasket and re-align.
- Was liquid poured warm or is the feeder in direct sun? → Yes: Thermal air expansion is forcing nectar out. Cool liquid to room temperature and shift feeder to full shade.. No: Flip the feeder upside down quickly in one rapid motion to create an airtight vacuum lock.
Action Plan: Resolving Your Feeder Drips Today
Your decision: Determine whether your current feeder can be fixed with temperature adjustments, gasket cleaning, and shade placement, or if structural design flaws require upgrading to a slender sealed-base feeder.
Do this next: Tighten base threads securely while inverted, shift placement to complete shade, maintain cold fill routines, and inspect gaskets regularly.
- Read next: Troubleshooting Nectar Leaks and Solar Lights on Handcrafted Feeders
- Read next: Artisan Glass Hummingbird Feeder FAQ: Care, Cleaning, and Placement Secrets
https://solarhummingbirdfeeder.com
Take these immediate steps to restore a clean, zero-drip feeding station in your garden.
Key Takeaways for a Drip-Free Backyard Sanctuary
- Inverted feeders rely on an internal air vacuum seal; any compromise in airtightness causes steady dripping.
- Direct sunlight warms top air pockets, causing thermal expansion that forces nectar through lower ports.
- Filling reservoirs to 90-95% capacity reduces air volume, drastically lowering thermal leak risks.
- Always let fresh sugar syrup cool completely before filling your feeder.
- Clean base gaskets with warm water during every refill to remove sticky syrup residue.
- Slender glass designs with precision-fitted metal bases resist pressure fluctuations far better than wide plastic bottles.
Choosing the Right Feeder Design for High-Heat & Windy Climates
Most feeder leaks stem from thermal air expansion in inverted bottles or compromised thread gaskets. Selecting slender, handcrafted glass reservoirs paired with anti-rust sealed metal bases minimizes internal air volume expansion while offering heavy-duty stability in garden winds.
Best choice for
- Slender hand-blown glass reservoir with sealed anti-rust metal base — Slender bottle geometries limit top air surface area, curbing thermal pressure build-up when ambient temperatures spike.
- Heavy structural glass feeders with rigid metal perches — Weighted art glass resists wind sway, preventing nectar from spilling over internal port thresholds during gusts.
- Thin, wide-mouth plastic inverted bottles hung in full direct sun exposure
- Feeders with unthreaded friction-fit rubber stoppers that lack internal locking O-rings
- Saucer / Dish Style Feeder — Nectar sits below ports without requiring a atmospheric vacuum seal, completely eliminating thermal expansion drips.
The Leak-Resistant Standard: LUJII Hand-Blown Solar Feeder
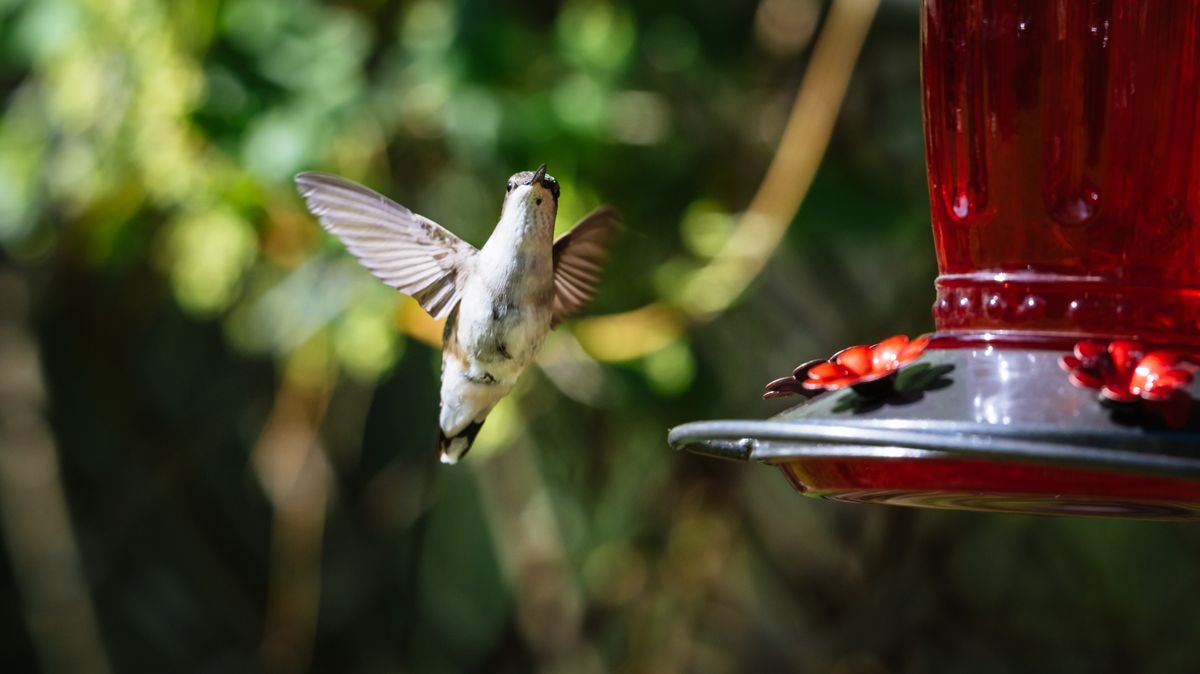
If you are tired of sticky decks, wasted sugar water, and constant ant invasions, upgrade your garden with a feeder designed specifically to combat leaking while casting a magical evening glow.
The LUJII Solar-Powered Hummingbird Feeder combines thick, hand-blown art glass crafted at 2,300°F with an engineered, leak-resistant slender profile. Its precision-sealed anti-rust metal base holds a tight vacuum seal, keeping up to 32 fl. oz. of nectar safely inside where hummingbirds can reach it.
As dusk falls, the waterproof solar cap lights up the hand-blown patterns automatically with vibrant, multi-mode RGB lighting for up to 8 hours. It is the ultimate fusion of avian engineering, artistic beauty, and nighttime garden decor.
Feeder Architecture & Leak Risk Matrix
| Feeder Type / Architecture | Vacuum Seal Reliability | Thermal Expansion Vulnerability | Wind Sway Resistance | Durability & Aesthetics |
| --- | --- | --- | --- | --- |
| Standard Plastic Inverted Bottle | Moderate - Plastic threads warp easily over time | High - Thin walls expand in heat, forcing syrup out | Low - Lightweight structure sways easily in breezes | Low - Discolors, clouds, and degrades in UV sunlight |
| Wide-Mouth Glass Inverted Vessel | Good - Solid rim seals well against flat gaskets | Moderate/High - Large upper air pocket expands under sun | Moderate - Heavier glass reduces light wind sway | Moderate - Attractive but vulnerable to top air expansion |
| LUJII Slender Hand-Blown Glass & Metal Base | Exceptional - Sealed metal base with precision O-ring | Low - Slender glass bottle minimizes air expansion volume | High - Heavy handcrafted glass resists wind movement | High - Artisan 2300°F glass art + automatic solar RGB lighting |
| Flat Shallow Saucer / Dish Feeder | N/A - No vacuum required (open liquid pool) | None - Liquid sits naturally below port holes | High - Low center of gravity prevents tipping | Moderate - Functional against drips but lacks height & night lighting |
Compare how different hummingbird feeder construction materials and shapes respond to heat, pressure, and outdoor elements.
How to Repair a Dripping Feeder: Step-by-Step Fixes
If your feeder is currently dripping nectar, execute these simple mechanical fixes to re-establish a tight vacuum seal.
Step 1: Remove and Cool the Reservoir
Take down the dripping feeder immediately to stop wasting nectar and deter ants. Empty the remaining liquid into a clean measuring cup. If the nectar is warm from sitting in the sun, let it sit in your refrigerator for 20 minutes. Never pour warm syrup into an inverted feeder bottle.Step 2: Wash and Inspect Base Gaskets
Unscrew the metal or plastic base components. Look closely inside the threaded groove for small grains of sugar, dried nectar crust, or dirt particles. Even a microscopic gap allows air to creep upward into the reservoir, destroying the vacuum lock. Rinse the rubber O-ring under warm tap water and ensure it sits perfectly flat inside its channel.Step 3: Refill Reservoir to 95% Capacity
Fill your clean, clear bottle nearly to the very top with room-temperature or chilled 4:1 sugar solution. Leaving only a small air pocket at the top dramatically limits the amount of air that can expand when ambient afternoon temperatures increase.Step 4: Secure Threads and Invert Rapidly
Screw the base onto the bottle threads tightly by hand. Do not force or over-torque the threads, as excessive pressure deforms rubber gaskets. Once secured, hold the feeder upright over a sink and flip it upside down in one fast, continuous motion. You will see a few bubbles rise to the top—this indicates your internal vacuum seal is established!Step 5: Hang in Deep Canopy Shade
Choose a hanging spot protected from direct midday sun rays. Hanging your feeder under a shade umbrella, broad tree branch, or covered porch ceiling keeps the internal air space cool, preventing thermal pressure buildup all day long.5 Critical Mistakes That Force Nectar Out of Your Ports
Avoid these common user errors that destroy feeder vacuum pressure and attract yellowjackets to your garden.
Keep your garden sanctuary thriving with expert care tips and maintenance guides. Learn how to maintain artisan hand-blown glass, protect your feeders during intense summer weather, and keep pest insects away naturally:
- Troubleshooting Nectar Leaks and Solar Lights on Handcrafted Feeders
- Artisan Glass Hummingbird Feeder FAQ: Care, Cleaning, and Placement Secrets
- Hand-Blown Glass vs. Plastic Hummingbird Feeders: Aesthetic and Durability Compared
- Summer Storm Protection: Weatherproofing Your Glass Solar Hummingbird Feeder Setup
Frequently Asked Questions About Hummingbird Feeder Leaks
Why is my hummingbird feeder leaking out of the feeding ports?
Port leaks are almost always caused by thermal expansion of air inside the inverted reservoir pushing liquid down, or a loss of internal atmospheric vacuum pressure due to loose base threads or a damaged rubber gasket.
Can direct sunlight cause a hummingbird feeder to drip?
Yes. Solar radiation heats the air trapped in the top section of the bottle. As the gas expands, it increases internal air pressure, forcing syrup out through the lowest openings (the port flowers).
How do I fix a leaking rubber gasket on my feeder?
Inspect the gasket for cracks or warping, clean away dried sugar buildup from the base channels, ensure it sits completely flush in its groove, and hand-tighten the base firmly without over-torquing.
Why does my feeder start dripping when it's half empty?
A half-empty feeder contains a significantly larger volume of trapped air than a full one. A larger air pocket undergoes much greater total volume expansion when heated by midday temperatures, resulting in rapid port dripping.
Get fast, clear answers to common questions about feeder pressure, gaskets, and outdoor placement.